
Who’s ready for a new current salad obsession? Oh good, us too. In fact, we’re already here. Welcome!
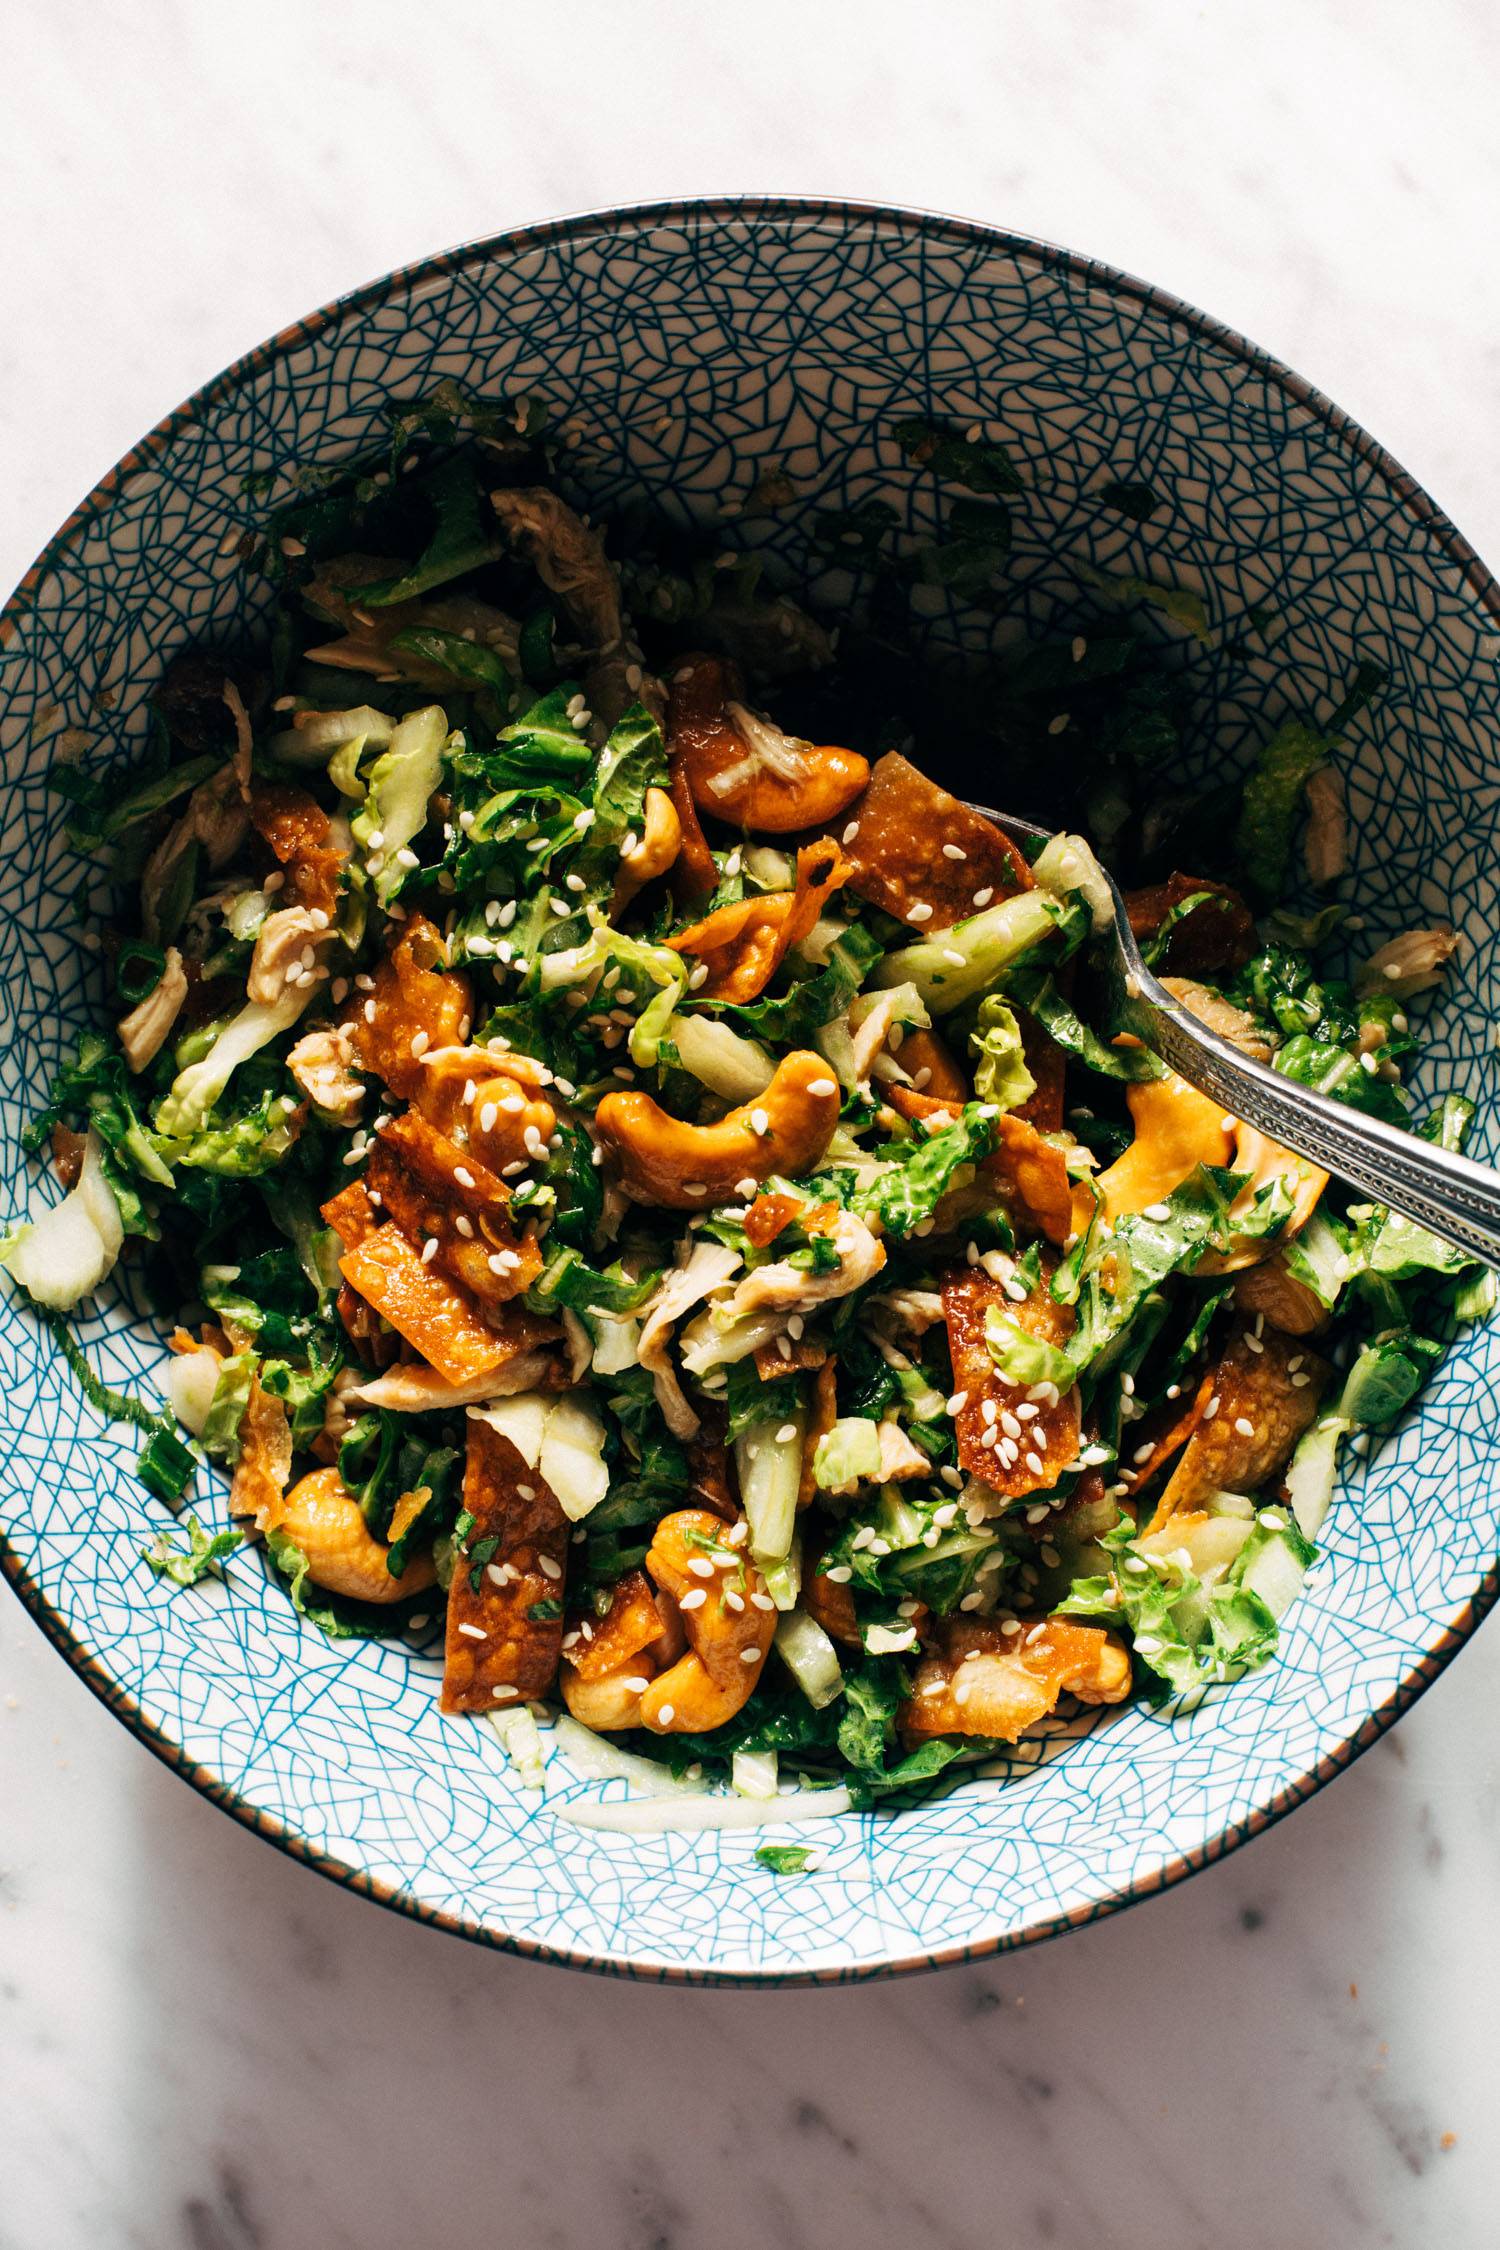
Thinly sliced and ever so slightly sweet and tender-crisp fresh napa cabbage, juicy rotisserie chicken, a super easy homemade sesame dressing, and CRUNCHED UP TO THE MAX with handfuls of cashews, fried wonton strips, dried ramen noodles, crispy fried onions, or sesame sticks…really any delicious cruncher you can find. Or…dare we say…*every* delicious cruncher you can find? We won’t judge.
Live your best super crunchy, super fresh, napa chicken salad life. Super simple and so delicious.
In This Post: Everything You Need For Napa Chicken Salad
- Ingredients for This Napa Chicken Salad
- What is Napa Cabbage and Where to Find It
- How to Clean Napa Cabbage
- How to Cut Napa Cabbage
- How to Make This Napa Chicken Salad
- How to Make Fried Wonton Strips
- More Add-ins and Variations
- How to Store This Salad
- Napa Chicken Salad: Frequently Asked Questions
Ingredients For This Napa Chicken Salad
The ingredient list overall for this beauty is pretty darn simple, but each thing packs its own flavor and textural punch. The dressing is sweet but with a nice little tang and depth. The salad build is just a chomp-fest and we can’t get enough. Here’s what you’ll need!
All the salad fillers and crunchers:
- shredded napa cabbage
- green onions
- shredded rotisserie chicken
- cashews
- fried wonton strips (super easy and our fave, but there other options too!)
- sesame seeds
Homemade sesame dressing:
- neutral oil like vegetable (avocado oil is also great if you like that flavor!)
- a sweetener (granulated sugar, maple syrup, or coconut sugar)
- rice wine vinegar
- soy sauce
- sesame oil
- salt
You can play around with the dressing flavors to whatever you love best. Switch up the sweetener or scale/omit the sesame oil and rice vinegar, though they’re such a nice varied flavor boost that both are a must around here!
What Is Napa Cabbage and Where To Find It
If you’re not familiar with napa cabbage, it is oblong-shaped and thinner than regular green cabbage and has a more varied texture with tender leafiness as well as crisp parts. It is also slightly sweeter and milder. Napa cabbage is native to China (sometimes also sold as Chinese cabbage) and is a staple ingredient in East Asian cuisine. Super versatile and great for stir-frying, stewing, braising, grilling, and fermenting (yay kimchi!), but also is delicious straight-up raw and thinly sliced like in this salad!
It’s available at most grocery stores, so you shouldn’t have any trouble finding it, but if you get in a pinch, savoy cabbage or white cabbage would be a good substitute.
How To Clean Napa Cabbage
Because Napa cabbage is not as tightly balled-up as regular ol’ green cabbage, you really gotta get between those leaves to shake the dirt out. The preferred method over here is to pull the leaves from the stem, clean them well, and then stack ’em up and patiently slice super thin.
How To Cut Napa Cabbage
If you don’t want to stack the leaves up to slice them super thinly by hand, you could also go the mandoline route. Just slice the head on the cabbage first and then let the shreds soak in water for a bit so the dirt drops (kind of like how you clean leeks) but that one felt a little more awkward since napa cabbage isn’t as firm as regular cabbage.
We also like to mostly use the middle of the head, so you get some of the firmer crunchier white parts and some of the leafier more tender green parts, so we lopped off the bottom core and the floppier tops and went from there!
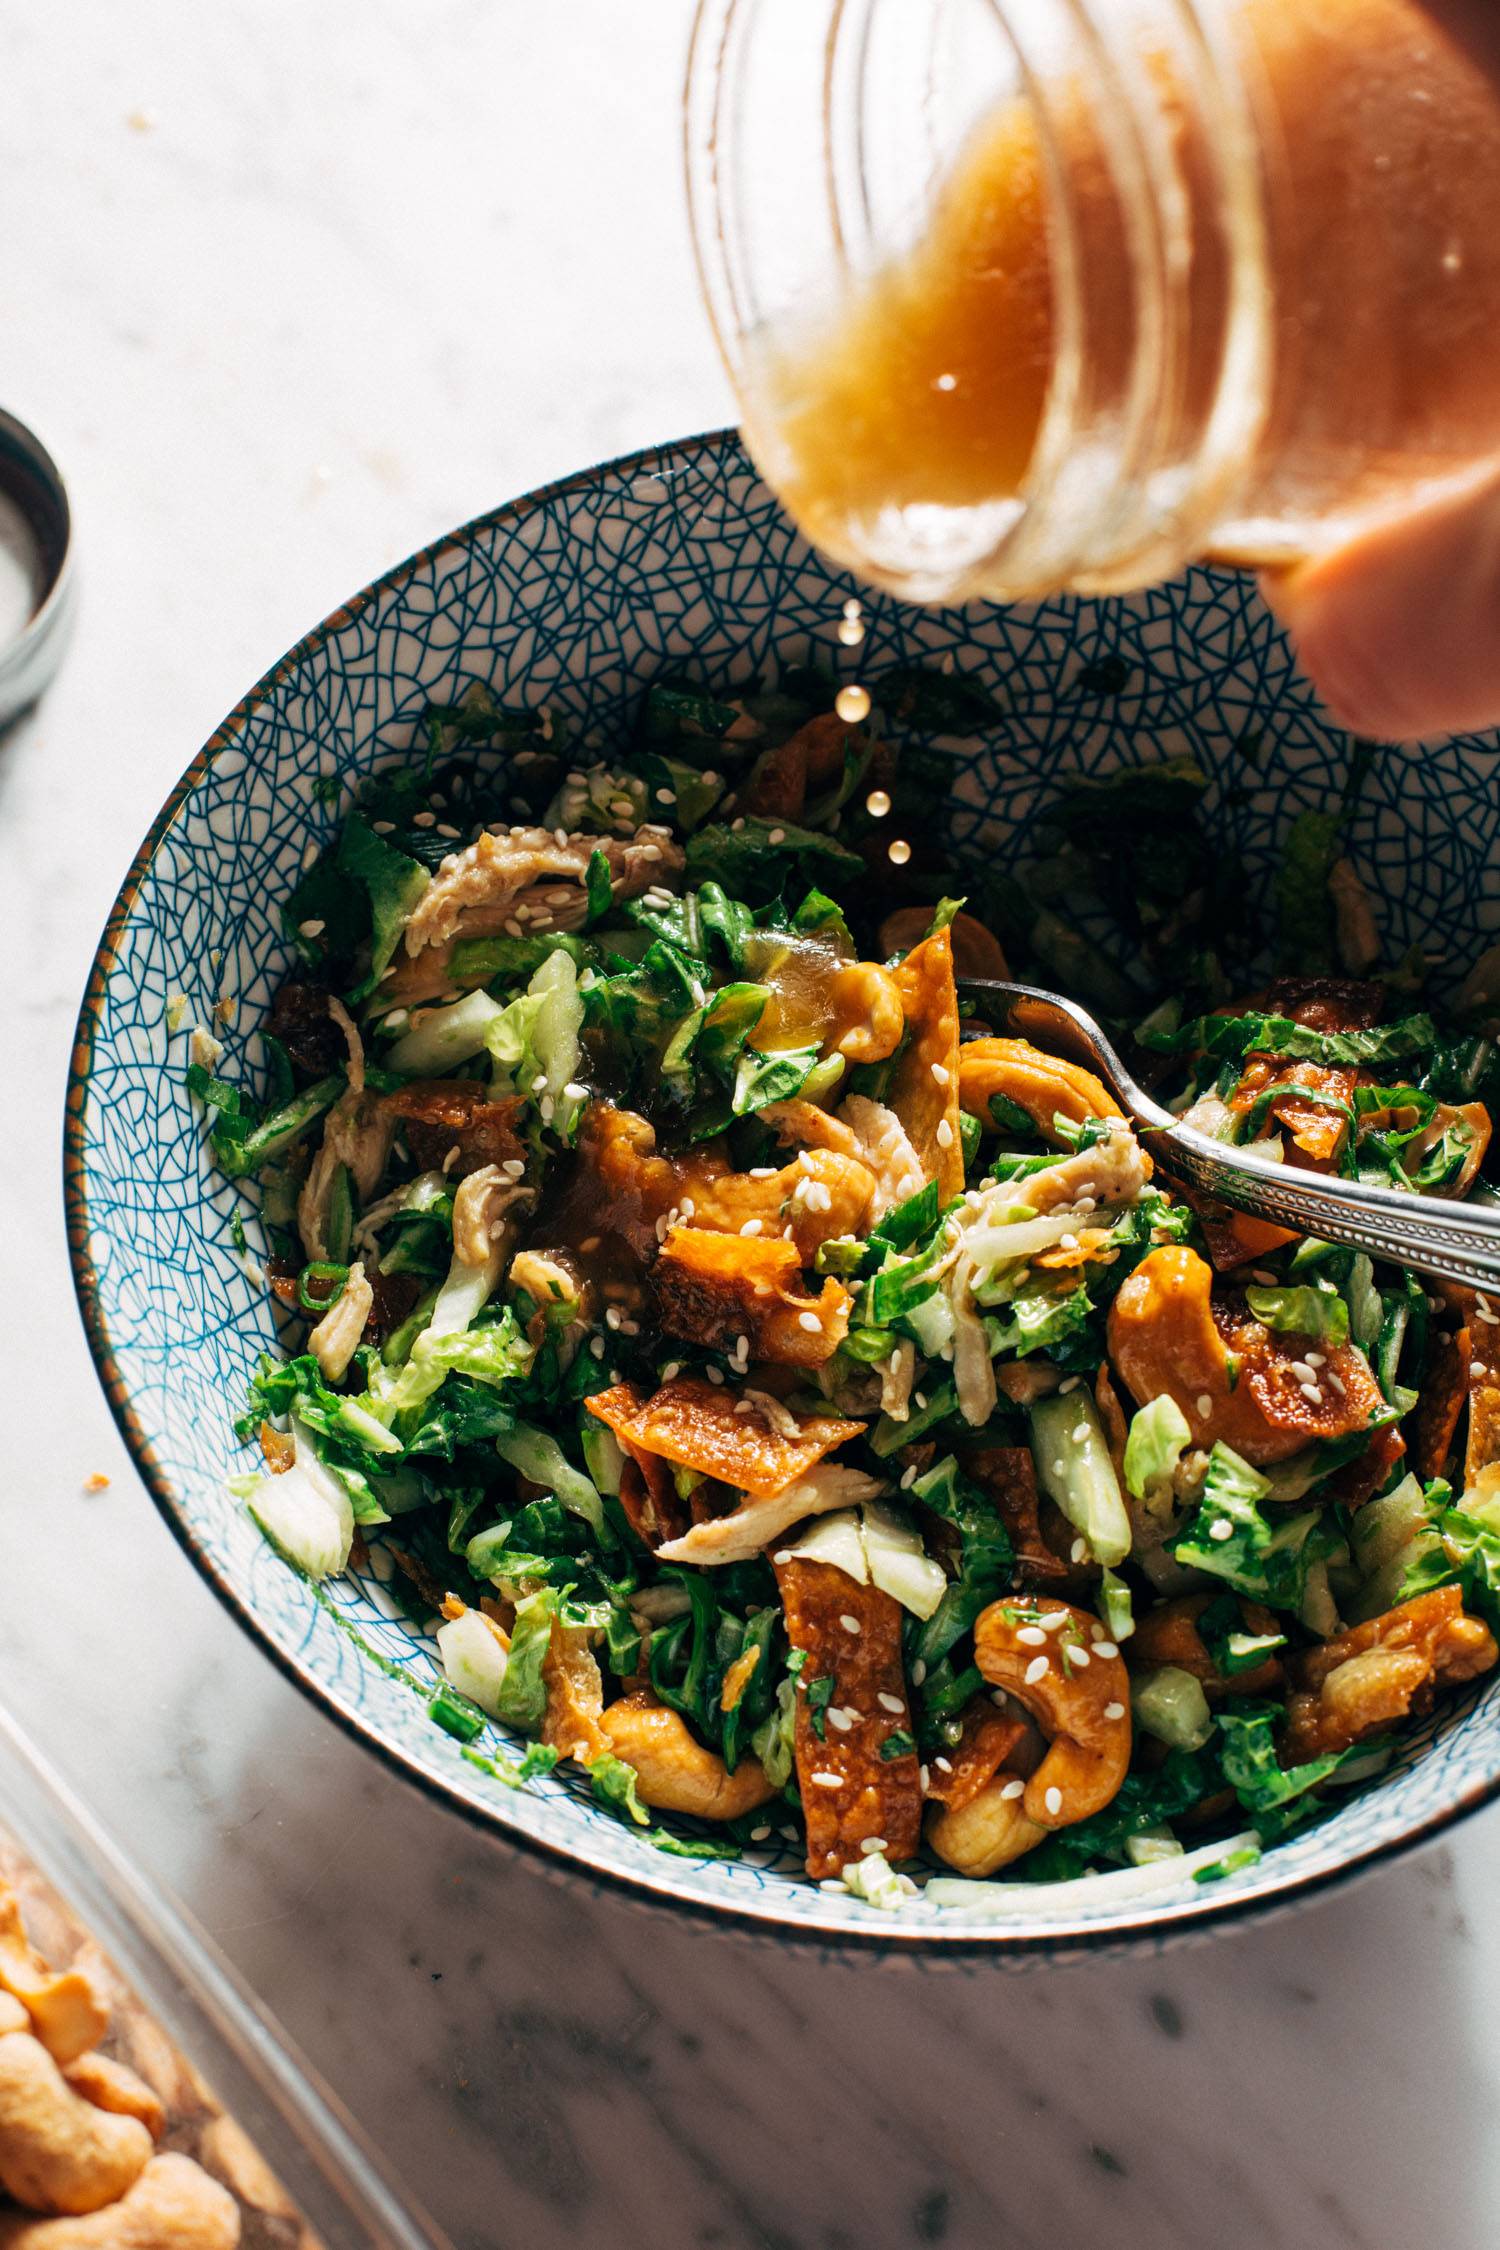
Let’s Get Cooking
Now that it’s cleaned and cut, get ready for a very pleasing texture party! There’s a little extra step to cut and fry up those wonton strips but you’ll be so thankful you did. And beyond that, thanks to rotisserie chicken and really only a couple items on the chop list, it comes together pretty quickly!
- Chop. Use your preferred method to shred the cabbage and chop the green onions and then that little mixture will keep in an airtight container for several days, yay! Shred your rotisserie bird.
- Shake. Toss all dressing ingredients in a jar, turn on your fave song, and shake-dance accordingly.
- Serve. Toss the cabbage mixture with the chicken, cashews, wontons, and a generous dressing splash. Sprinkle some extra green onion and sesame seeds on top for fun and flavor!
How To Make Fried Wonton Strips
A word about those homemade wonton strips: just cut wonton wrappers into strips and fry them in a little bit of oil over low heat; drain on paper towels and sprinkle with salt. That’s it! So quick and so worth it!
Fair warning that it is entirely possible you may get ready to toss and serve your salad only to find that you’ve eaten every last one of those crispy, salty, deliciously snackable little fried wonton strips, and whooooops. Luckily, they are very easy to make so you can hop right back on it.
Other Fun Crunchies and Add-Ins For Your Salad
Other add-in options for crunch and yum are crumbled-up dry ramen noodles (yes, those! from the package!), sesame sticks, crispy chow mein noodles, or even those crispy fried onions we know and love.
Want even more green in there? Edamame or avocado would not disappoint. You could also switch up the protein with a little shrimp maybe? Yum. Have at it.
How To Store This Salad
And, as if you needed even more to love about this salad, everything will keep really well for several days in separate containers so it is such a great meal prep option for you to toss up and chomp any day of the week. DREAMBOAT.

Napa Chicken Salad: Frequently Asked Questions
Shrimp would be really, really good! For a vegetarian option, edamame would be perfect!
Vegetable oil is neutral (no flavor), so that works well here. But if you don’t mind the taste of avocado oil, that also works really well here!
This makes a huge batch of dressing that will last through at least 10 cups of shredded napa cabbage! Great to keep in the fridge for lunches throughout the week, or toss altogether at once for a big dinner party or potluck-style salad.
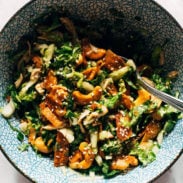
Napa Chicken Salad with Sesame Dressing
-
 Total Time: 20 minutes
 -
 Yield: 8 generous servings
![]()
Print Recipe
![]()
Pin Recipe
Description
This Napa Chicken Salad is crunched up to the MAX! Fresh napa cabbage, juicy rotisserie chicken, a super easy homemade sesame dressing, and crunchy handfuls of cashews, fried wonton strips, dried ramen noodles, crispy fried onions, or sesame sticks…the choice is yours!
Ingredients
Units
Napa Chicken Salad:
- 1 head of napa cabbage, cleaned, trimmed, and shredded (about 10 cups)
- 1 bunch of green onions, finely chopped
- shredded rotisserie chicken (as much as you want)
- 1 cup of cashews
- 1 cup of something crunchy – fried wonton strips, crispy fried onions, or crushed-up dry ramen noodles
- sesame seeds (optional)
Sesame Dressing:
- 1/2 cup + 2 tablespoons vegetable oil or avocado oil (see FAQs)
- 1/2 cup maple syrup or granulated sugar
- 3 tablespoons apple cider vinegar
- 2 tablespoons soy sauce
- 2 tablespoons sesame oil (to taste)
- salt to taste
Instructions
- Toss the shredded cabbage with the green onions (and you can keep this mixture in an airtight bowl in the fridge for several days)!
- Shake all the dressing ingredients in a jar.
- When you’re ready to serve, toss the cabbage mixture with the chicken, cashews, wontons, and enough dressing to generously coat. Serve with extra green onions and sesame seeds on top!
-
Prep Time: 20 minutes
-
Cook Time: 0 minutes
-
 Category: Salad
-
 Method: Chop
-
 Cuisine: Asian-Inspired
Keywords: napa chicken salad, napa salad, napa cabbage salad
More Cabbage Recipes We Love
- Chopped Thai-Inspired Chicken Salad (another delicious salad with BIG flavors)
- Detox Rainbow Roll-Ups with Peanut Sauce (a rainbow-filled lunch!)
- Buffalo Cauliflower Tacos with Avocado Crema (and a crunchy cabbage-filled slaw)
The post Napa Chicken Salad with Sesame Dressing appeared first on Pinch of Yum.